11 Querygenerator - SQL

The Querygenerator enables users to evaluate saved data via a graphic interface according to the user‘s own criteria and results lists. The base query and the base results list will be created by CreateCtrl AG according to your requirements.
Users can then open and close the Querygenerator in Tools > Querygenerator in the header:

Selecting the Base View
Available base views can be selected via a drop-down list. For the selected query, the tab SQL shows the basic view on which the query is based as well as the name of the query. The tool button on the right enables you to view the rights assignment. Source Query displays all fields for the results list which are made available by this base view. The flag Display enables you to hide/show certain lines of the results list.
User Rights for the Querygenerator

The button  opens the window that enables you to administer user rights. When you select a base view, the window below displays all users that have been assigned to this base view.
The button  enables you to add users to this list. The button
  adds ALL users to this list. You can save your amendments by clicking on the Close button.
Notice:
CreateCtrl usually assigns all users when creating the query. Should you have any questions, please contact the CreateCtrl Support (support@createctrl.com).
Select Columns to be Displayed and Sort Data
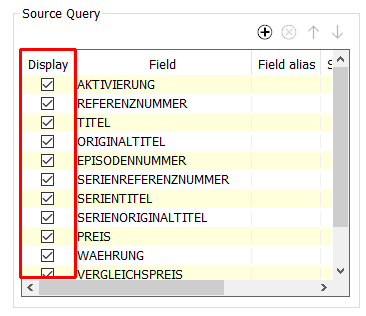
The flag Display enables you to hide/show certain results. The sorting can already be set before executing the query. Available options which can be activated by clicking on the field Sorting several times include: sorting in ascending order, sorting in descending order, no sorting.
Entering Search Conditions
You can enter a search condition for a certain line by clicking on this line in the column Condition. This opens the dialog Define conditions:
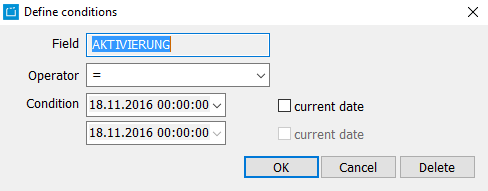
You can enter the condition and leave the default settings in the operator field (LIKE). If required, you can select one of the following values for the operator field:
Operator | Description |
|---|---|
!= | unequal / is not equal to (to be used for comparisons of dates and figures) Example: !=2 unequal to 2 |
< | less than Example: <2 less than 2 |
<= | less than or equal to Example: <=2 less than 2 or equal to 2 |
<> | unequal (see above) |
= | is equal - with no exception |
> | greater than Example: >2 greater than 2 |
>= | greater than or equal to Example: >= greater than 2 or equal to 2 |
BETWEEN | between (figures or dates) Example: 01 Jan 00.00 am and 01 Feb 00.00 am (all days in January, including limits) |
IS NOT NULL | is not null |
IS NULL | is null |
LIKE | similar; with this operator, the flag „Not case sensitive” should be activated, so that the query detects similar search terms in upper as well as lower case |
NOT BETWEEN | all terms outside of this period or numerical value |
NOT LIKE | all terms which are not like the search term |
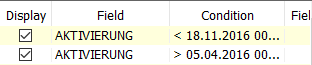
Enter Several Criteria in One Field
In some cases, it can be necessary to enter several criteria in one field. In this case, the field has to be entered in the query several times.
- Click the button Opens the list of columns for this base view
 .
.
→ This will open the dialog Available columns: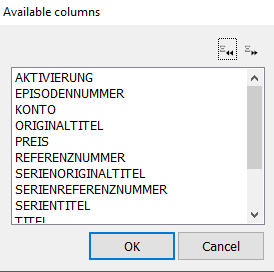
- In this list, select the information that should be shown as an additional column and click on OK.
→ The results list will now display the additional column; the order of the columns can be amended with the arrow buttons. The two buttons in the dialog enable users to select any column and to delete the selection. - Please enter the additional condition for the new field.
Should more than two conditions be required, this process can be repeated until the required number of listings of this field is obtained. - Then start the search by clicking on the button Start query.
Saving Queries
When you have compiled a query with all criteria (fields, sorting and condition) that you require, you can save the query for later use. Enter a query name in the field Query name and save the query by clicking on the button  . The new query is now available in the drop-down list. Saved queries can also be amended further.
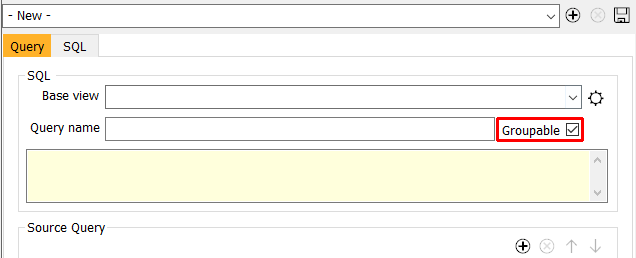
Flag Groupable
If you activate the flag Groupable, you have different possibilities to extract more information of your data. The field Grouping enables you to create a evaluation using the number, sum, maximum, minimum or average of entries. The field Having enables you to narrow the results.
- Select the base view in which you want to count.
- Activate the flag Groupable.
- Remove the flag Display of almost every line. Only leave the flag of the fields that you want to count.
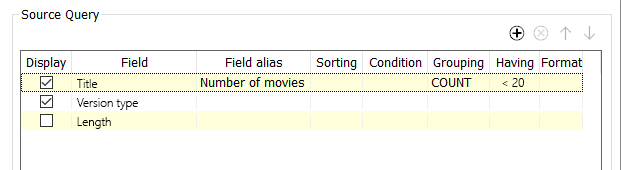
Example: If you want to count, how many titles belong to a version type, display the fields Title and Version type.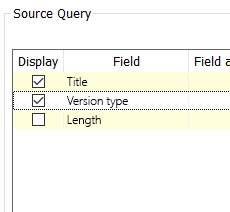
- In the field, that you want to count, click the field Grouping and select, if you want to select all entries (COUNT) or only different entries (COUNT(DISTINCT)).
Example: If you want to count all titles, select COUNT in the field Grouping. If you want to ignore double entries, select COUNT(DISTINCT).
In the example, a different column name was added in the field Field alias.
You can also select MIN (for minimum of each entry), MAX (for maximum of each entry), SUM (for sum of each entry - only for numbers), AVG (for average of each entry - only for numbers). - Press Start query.
→ You will now see the results of your query in the results area.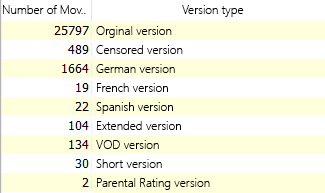
- If you are not satisfied with the results, you can narrow the results down. In order to do that, please add a condition in the field Having.
Example: If you want to see only version types with less than 30 entries, to identify seldomly used version types, please enter < 20 in the field Having.