Basic Functions
All WebSuite applications have the same basic functions and the same structural setup.
Basic Functions
General Settings
 App Setup

 Search
By entering search terms into the search field the stock displayed in the content section gets narrowed down. Only stock with title text related to the search term(s) is displayed.
Some apps have individual stock filters. In those apps you can find related search result statistics left of the content section.

Search field and individual stock filter.
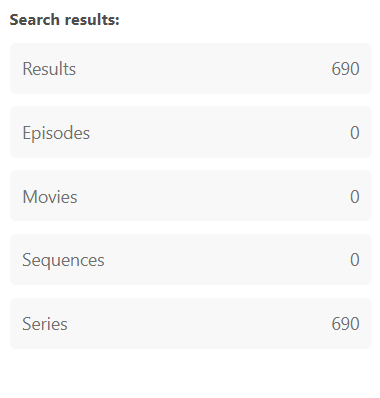
Search result statistics
 SmartSearch
SmartSearch is an extended search function. It searches the stock with regards to previously configured filter options.
→ see 'SmartSearch'
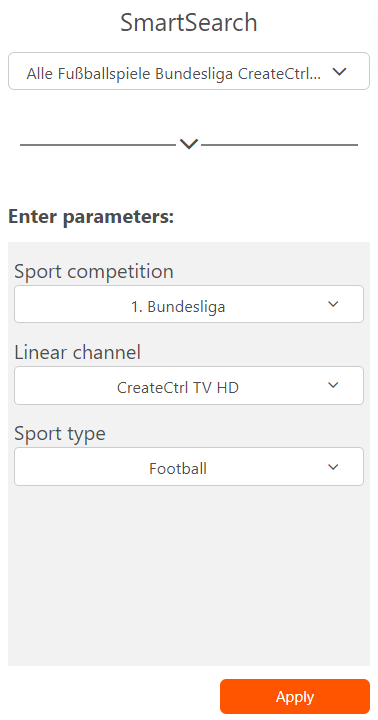
SmartSearch filter
 Filter
There are different options to filter your stock.
| Name | Location | Activation | Functions | Deactivation |
|---|---|---|---|---|
Main Filter
| Vertical Menu Bar |
|
|
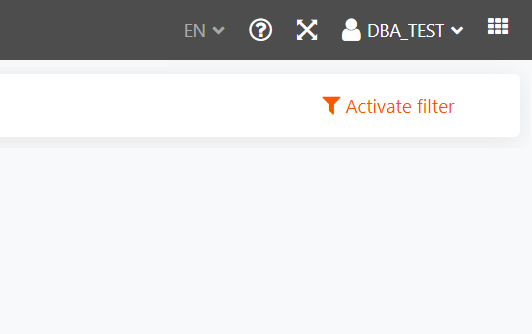
Click on 'Deactivate filter' text |
My Filter
| Vertical Menu Bar |
|
| 'My filters' are deactivated on clicking 'Reset' action text |
Typ Filter
| Next to search field |
| Sorting the stock according to filter options available | One or several filter options are active at all times |
Dropdown Filter
| Next to search field | Wherever available, the filter is permanently visible | The stock is sorted according to filter options available | On selecting 'All ...' option, the filter is deactivated |
SmartSearch
| Additional functions next to side menu |
| Configuring SmartSearch filters:
Using SmartSearch filters:
| SmartSearch filters are deactivated when selecting a different submenu section than SmartSearch |
 General Settings
General settings are identical throughout all WebSuite apps. Additionally, each app has its own application-specific settings.
Select Settings
Password
- Click on 'change passwort' button

→ A dialog opens - Enter your current passwort
- Enter your new passwort
(Adhere to passwort requirements indicated atop) - Repeat to enter new passwort
- Confirm change by clicking on 'Save' Button

→ The new passwort is saved
Account Information
Register your login data.
- Enter your user name
- Enter your E-Mail address
- Click on 'Apply' Button

→ You are logged in and ready to start working with the app
Configuration
Select language setting for the apps. The WebSuite will open with your language selected. At 'Start application' drop-down menu, you can determine which app opens first on logging in the WebSuite.
Software Version
Find your current CreateCtrl WebSuite version and your purchased licence.
System Information
Information on database name, service provider and server infrastructure.
 Display options
On clicking cross symbol ![]() in upper right hand corner of main menu, the display of the app gets altered. The workspace is extended, while the browser window is hidden. Clicking the cross symbol again, the browser window is restored. Alternatively, you can use ESC key to end full screen mode.
in upper right hand corner of main menu, the display of the app gets altered. The workspace is extended, while the browser window is hidden. Clicking the cross symbol again, the browser window is restored. Alternatively, you can use ESC key to end full screen mode.
For displaying your stock as list or as tiles select respective icon left of search field.
 Online Help
On clicking question mark symbol ![]() you are being redirected to the user documentation website of the app. Here you can find detailed descriptions of app functions and step-by-step instructions on your tasks at hand. On the left hand side of the user documentation you find the content navigation structure.
you are being redirected to the user documentation website of the app. Here you can find detailed descriptions of app functions and step-by-step instructions on your tasks at hand. On the left hand side of the user documentation you find the content navigation structure.
 Calender
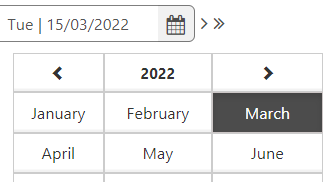
- Click on calender icon

→ The current months calender opens To select desired date:
The date has a different day The date has a different month The date has a different year 1. Select day 1. Click on month field
→ The months calender opens2. Select month
→ The calender of the selected month opens3. Select day
1. Click on year field
→ The months calender opens2. Click on years field
→ The years calender opens3. Select year
→ The calender of the selected year opens4. Select month
→ The calender of the selected month opens5. Select day

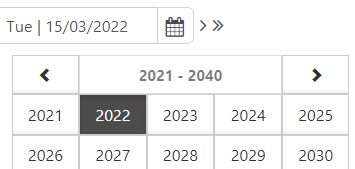
→ The desired date is being set.
Select a date
 Color Picker
Some apps allow you to determine the color of planning elements.
- Click on round color field
→ A window with color pallets opens - Place cursor on the right hand color bar
- Drag cursor to desired color
- Place cursor into left color area
- Click on desired hue
→ The selected color is displayed in round color field - Click on 'Save' button to store your selection
→ The color is now available in the application
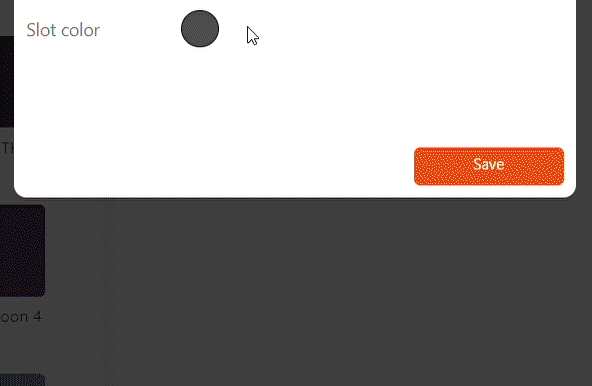
Color Picker
 Media
Media
Upload media content (images, videos, audio) and connect it with your planning data.
- Click on plus symbol
 of 'Add new media' action link
→ A drop-down menu opens - Click on 'Upload media' option
→ Upload dialog opens Click on 'Choose a file' button
→ Explorer window for file selection opens- Select desired file (multi-selection possible)
- Click on 'Open' button
→ Media file input section is created on grey background
→ File name is set as default name Set up the following information:
Function Required Name Name field 
Size File size in KB not editable Typ File format (JPEG, PNG, GIF, MP4, MOV, WAV, MP3, WMA) not editable Storage Drop-down menu with file storage options Number Individual numbering 
Lables Filterable lable terms for simplified search Tags Filterable tag terms for simplified search Description Text field Usage Type Purposed usage of media Thumbnails Standardized size reduction for media a) Click on 'Upload' action text
b) Click on 'Upload all' action text
→ The file is uploaded and displayed with grey backgroundTo delete uploaded files, click on bin icon
 .
.Click on 'Close' button in upper action bar
→ The uploaded files are displayed on grey background
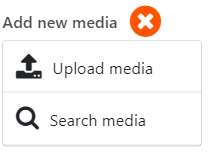
Add new media drop-down menu
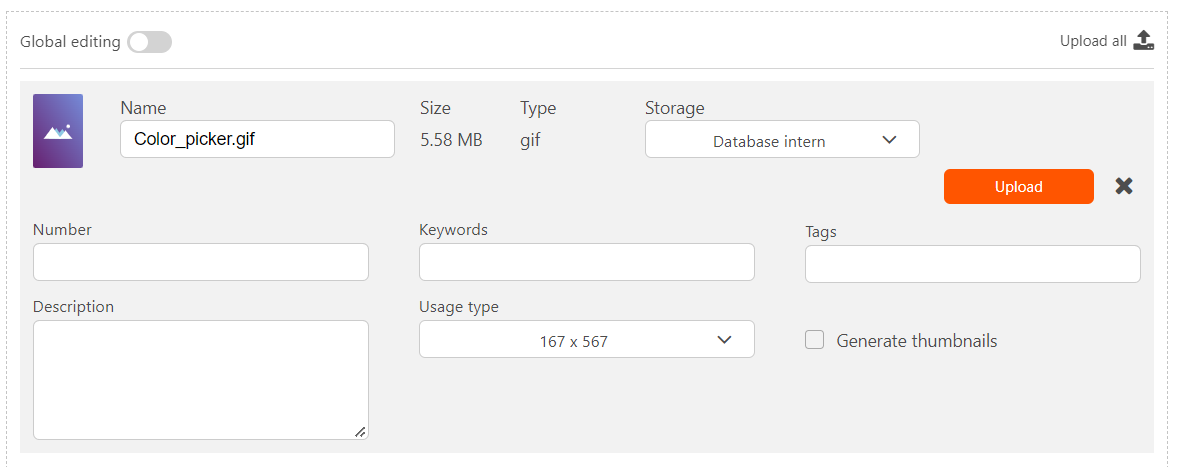
Editing uploaded file


Uploaded file with status 'file uploaded successfully'
List view
The list view of uploaded media opens when clicking 'List view' text link. All media and its metadata is show in a table.
- Clicking on column header, the column becomes dominant for sorting
The arrow indicates declining or ascending order - Pulling the separation line symbol
 the column is adjusted in width
 - The table settings open when clicking on cog wheel symbol

- Hide individualt table columns via eye symbol

- Change the sequence of colums by drag-and-drop.
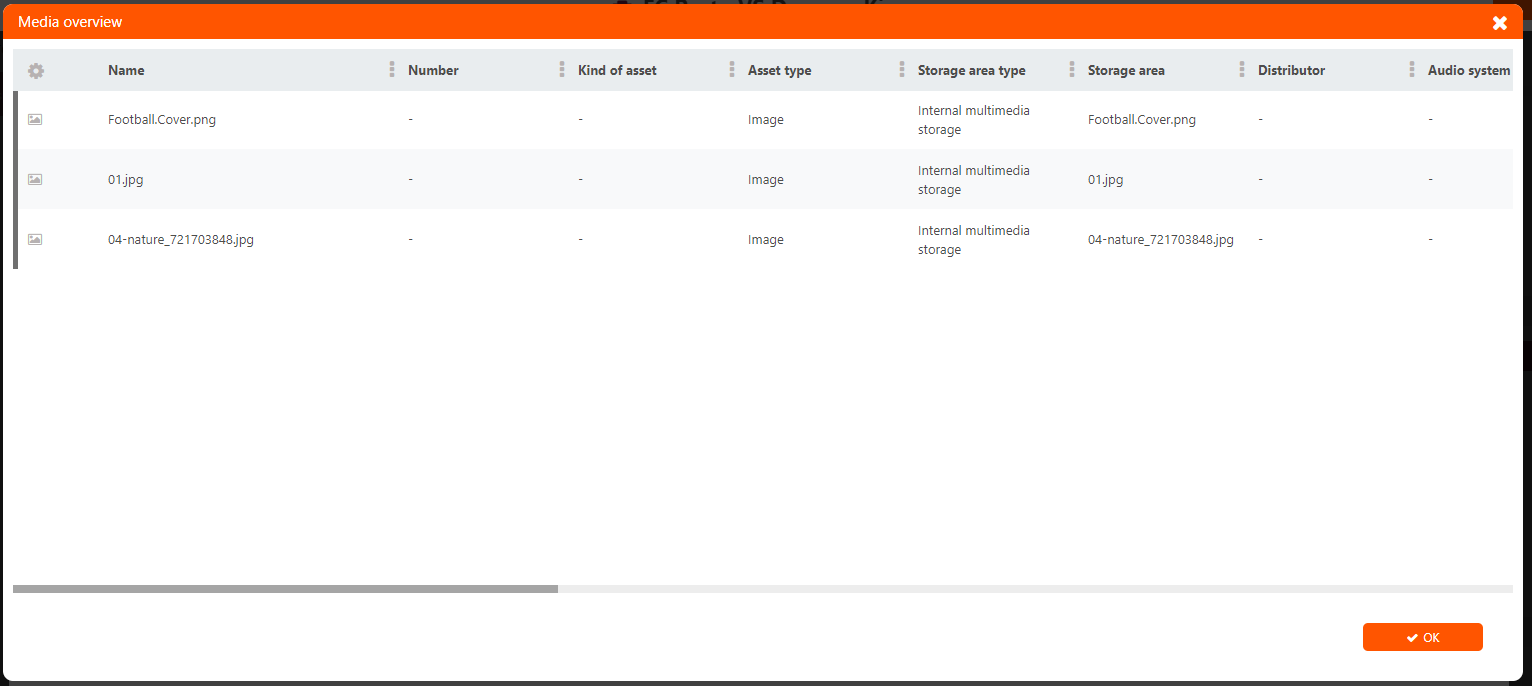
List of media

Table settings