10.1 Employing a Workflow
To Launch a New Workflow for a Certain Content
The content type (program, series, trailer etc.) of a workflow can already be defined on the initial creation of a workflow. On launching a workflow, based on this assignment all workflows referring to this content type are offered:
The following dialog opens - Here you can chose from all workflows that are assigned to this content:
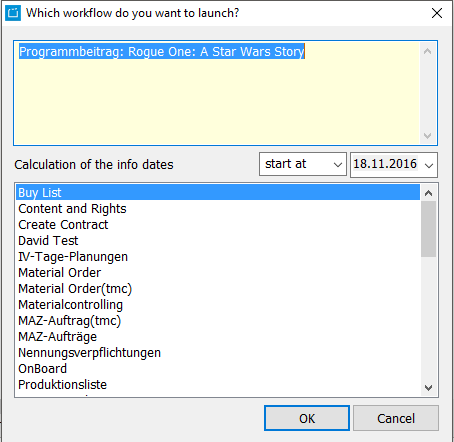
Please select the desired workflow from the list. Optionally you can determine the start date or finalization date for calculating the info date. After selecting the button OK the respective dialog opens (e.g. Workflow editing wizard, material order etc.).
Notice:
You also have the option to launch a workflow from any content-dialog. Please select Workflow > New process in the header and start the desired workflow:

Launching a Workflow with the Workflow Search
As an alternative to launching a workflow directly for some content (result lists and content dialogs) you can also launch a workflow with a workflow search in the ContentExplorer. Please proceed as follows:
- Select Workflow > Process search view in the header:

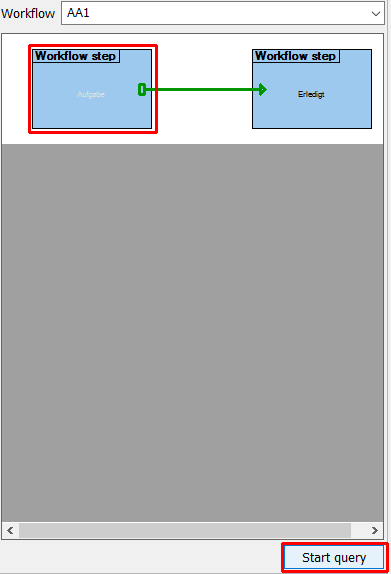
- Select the desired workflow type in the drop down list.
- The workflow will be displayed on the left in graphical form. Please select the workflow step that you want to start with. Then click on the button Start query:
Depending on your selected workflow step all matching entries will be listed. By double clicking on one of these entries you can open the Workflow Editing Wizard.
Alternatively you can start, edit, file or delete a workflow or assign a workflow status in the context menu of the right mouse.
Editing a Workflow in the Workflow Editing Wizard
In order to start the editing of a launched workflow there are several options:
- Please search for the content, e. g. for a program and open the tab Workflow > Workflow gr. (graphical) in the details area while selecting the content. There you can open the workflow editing wizard by double-clicking on one of the workflow or status steps.
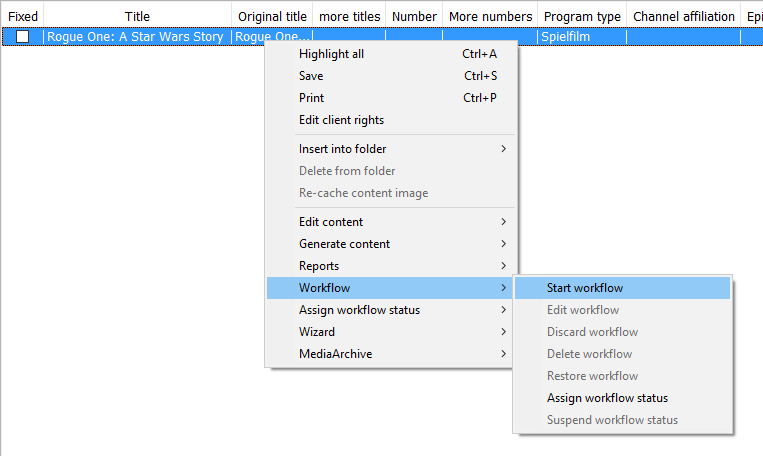
- Alternatively you can also choose the Workflow > Start workflow option while selecting the content with the right mouse. Please select one of the workflows from the list in the dialog "Which workflow do you want to launch?" and double-click on the workflow to launch the workflow editing wizard
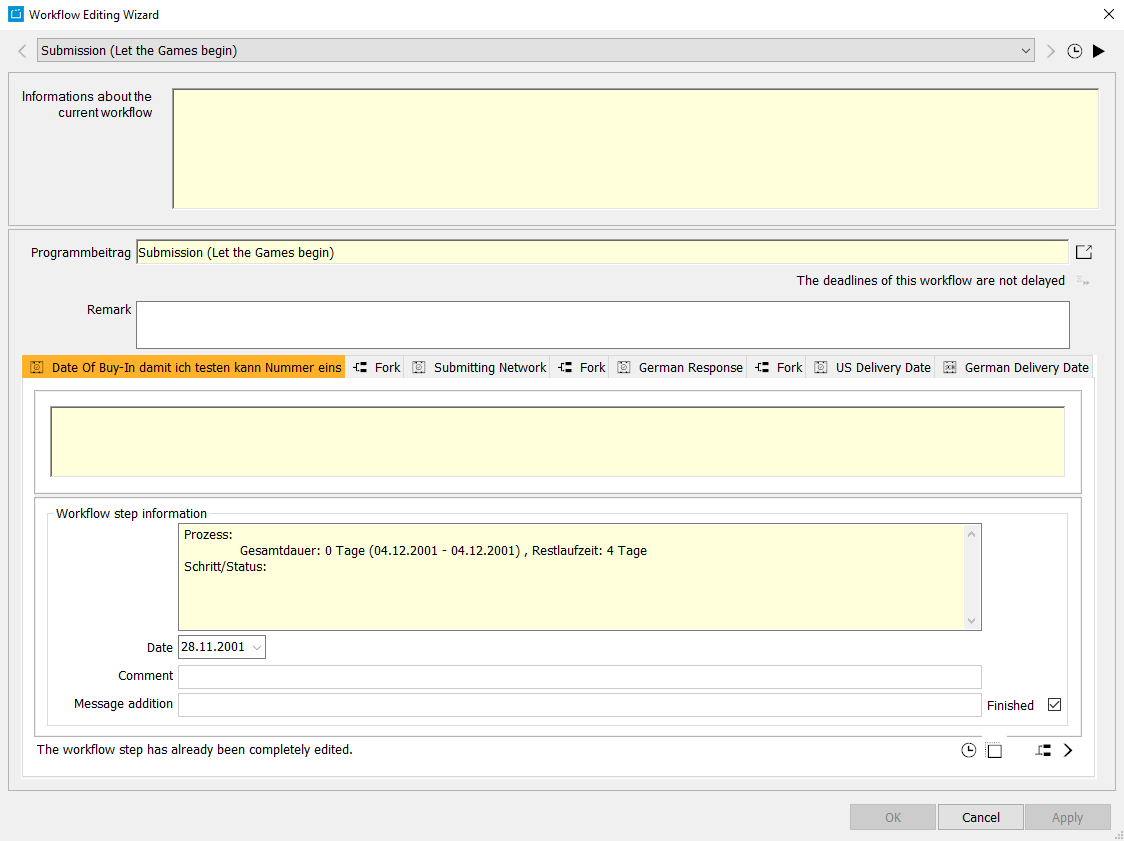
The actual editing of a workflow takes place in this dialog. Here, all workflow and status steps can be opened and edited. The order of the tabs corresponds to the chronology of the workflow and status steps of the workflow definition.
By clicking on one of the tabs you can open the workflow or status step you need to edit.
Notice:
Please mind that you can only edit a workflow step when the previous step has been finished. All steps that cannot be edited are displayed read only in addition with a notice below:
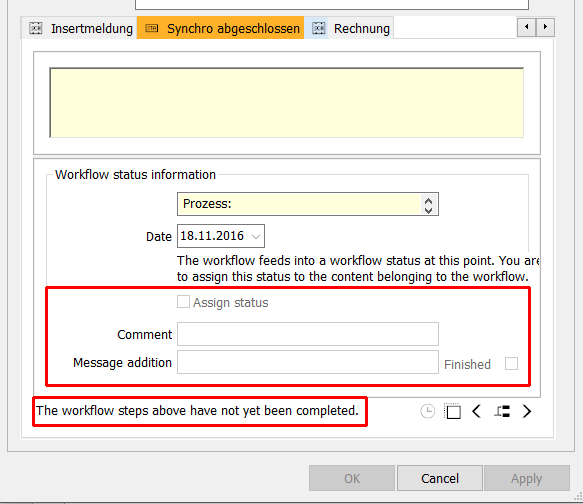
Please enter the information for each step (Date, persons/firms, Comments, Message addition etc.). The fields you have at your disposal here correspond to definitions made in the workflow definition dialog. As soon as you have finished one step please activate the flag Finished to enable the editing of the next step.
For a status step you can set the flag Assign status to finish the step.
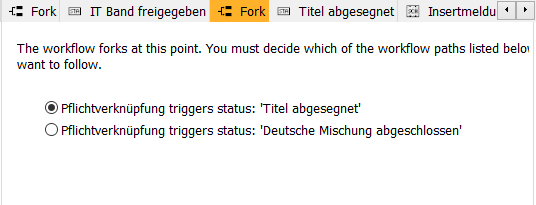
Forks can be opened, too. Here you can select the link type, see figure below:
Notice:
A status can also be set via the content, e. g. for a program in the tab Workflows of the content:
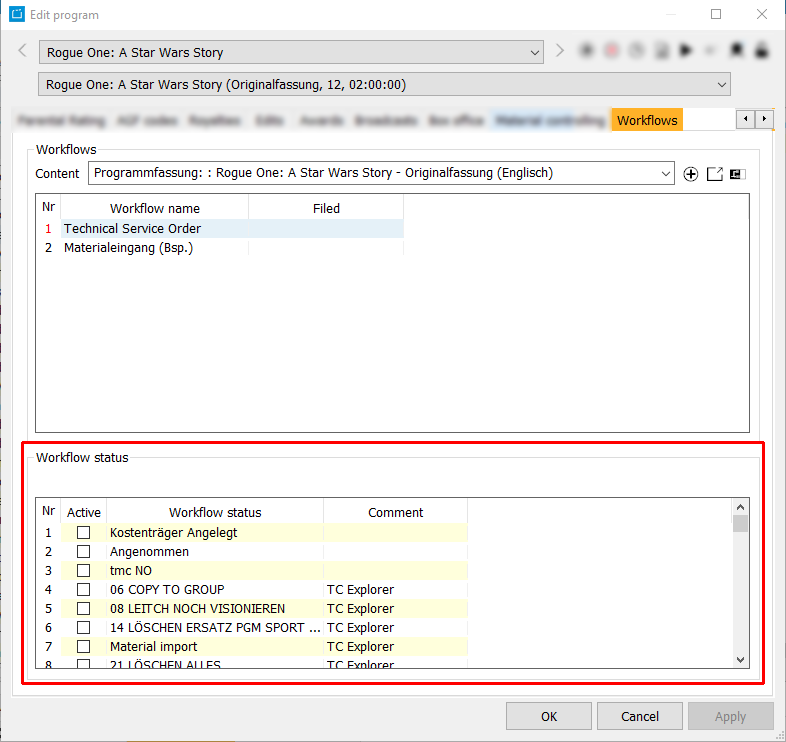
Further notes to the status:
- Status: Please enter a name on creating a status (without a name an error message will come up).
- In case a status was defined without a workflow, this status will be displayed in the actual workflow automatically.
- Please do not enter any "to do comments" in the status as these comments will be displayed in the dialog Edit program > Workflows as description.
- Please remember to set the flag Finished for your status. Otherwise this task will not disappear from your page Start > MyPage.