1.2 View
The Planner is separated in several sections for a user friendly employment - header, scheduling window and data bar.
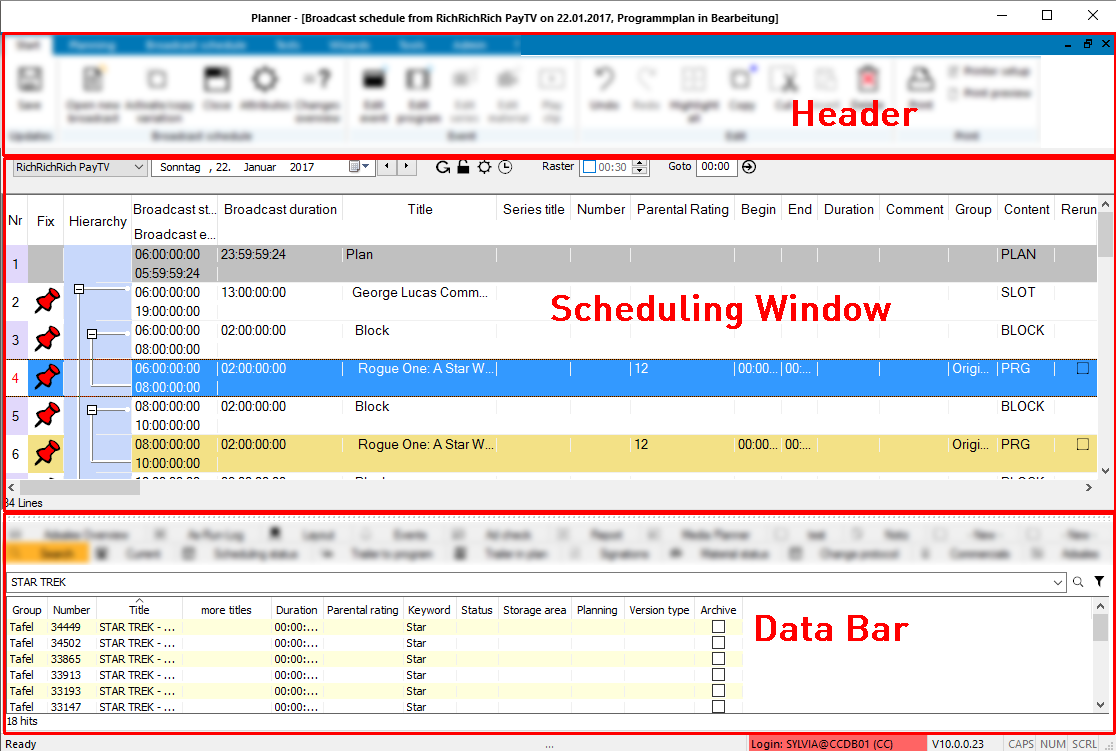
Header
The first horizontal bar beneath the title bar in the Programmer is the header. By clicking on one of the tabs or buttons, you can do different actions. Nearly all functions can be reached in this menu (some options can only be activated by a right-mouse click), see 2 Header.
Scheduling Window
You can open new or existing plans with the button Start > Open new broadcast. For opening an existing plan, you need to select the channel and the broadcast day. You can open several plans; by default, these plans are shown on top of each other, but you can reduce these windows by clicking on the reduce button (top right-hand) and arrange them according to your needs with drag-and-drop.
The bar for selecting the channel and the broadcast day applies to the active plan; you can activate a plan by clicking on it.
The broadcast day is shown as graphical list. The scheduling takes place by dragging and dropping the scheduling events (trailer, design elements etc.) from the lists in the data bar or from folders. The elements within the plan can be cut, copied, inserted ([CTRL + X], [CTRL + C], [CTRL + V]) or moved via drag and drop. You can also copy any parts of the broadcast plan to Excel or within the plan. As the broadcast plan has a hierarchical structure, only complete hierarchical blocks can be copied and inserted! You can arrange the columns and lines within the planning window, blend columns in or out and color the elements according to your needs, see 1.3.1 Setting the View of the Broadcast Plan and 1.3.2 Hierarchical Structure of the Broadcast Plan.
Data Bar
The data bar contains several tabs such as the search tab, the tab Current for current trailers, the scheduling status, material status etc. These tabs contain data in list form that can be dragged into the broadcast schedule. The tabs can be unhinged from the data bar and can be placed freely within the screen. Thus you can use several tabs simultaneously to edit the plan. In order to do this please drag the desired tab out of the data bar with the mouse. To hinge the tabs back again you just have to close the tab with the „X“ symbol. If required you can insert further folder and note tabs into the data bar to use them during the scheduling process. Folders can be created within the Programmer, Planner or else in the ContentExplorer and can be used here.
The tabs of the data bar are described in the following chapter: 3 Data Bar