5.2 Compacting Wizard for Time Ranges
This wizard in the Programmer compacts up to four individual time ranges each in a specific direction. All plan events within the respective time ranges will be moved up or down as requested and will be placed directly one after the other with the result that they are compacted to create more scheduling space.
Please proceed as follows:
Open the wizard by clicking the button Compact time ranges in the tab Wizards.
→The following dialog opens: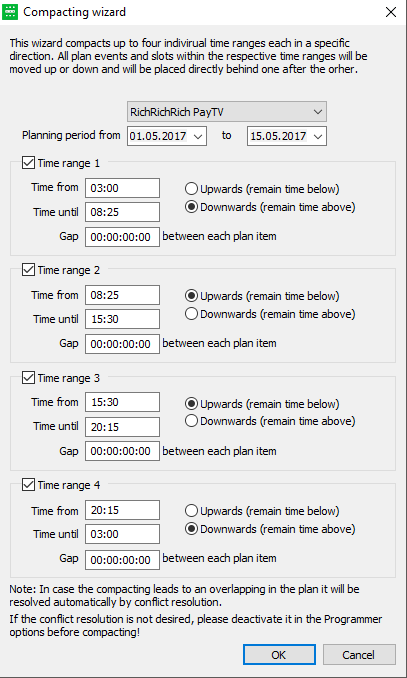
Please specify the planning range from/to (the default setting includes the entire scheduling area).
Activate all required time ranges by setting the flags (e.g. time range 1 and 2 or all).
Click OK to start the compacting. The events of the specified time ranges will be
pushed together. In case the compacting leads to an overlapping in the plan it will be resolved automatically by conflict resolution. If the conflict resolution is not desired, please deactivate it in the Programmer options before compacting!Before starting the compacting wizard you can set fix one or more of the elements you desire to compact. Select the respective element with the mouse (multi-selection by holding the [SHIFT] key) and activate the flag Compacting fix. If you will then start compacting the elements the fix elements will remain at their original position.