Editing individual assets
Introduction to assets
Assets are media files consisting of video, audio or image files. Assets can be edited in any layer of the menu area, i.e. the Search layer, the Folder layer and in the Favorites layer. Each asset has five or six editing options in the menu and a playback function.
What assets look like
Individual assets can be displayed either without or with a thumbnail.

Editing individual assets
Assets possess different editing options and a playback function, which is explained below: Asset playback
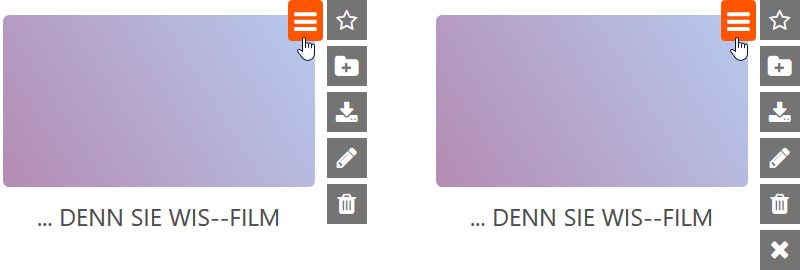
In each layer of the menu area, i.e. the Search layer, Folder layer and Favorites layer, you can click on an asset's orange hamburger button at the top right to display the editing options. In the Search and Favorites layers, five dark grey, vertically arranged buttons will appear. In the Folder layer, six buttons will appear.
1. Adding an asset to the favorites
The first editing option is to add an asset to the Favorites. If you drag the mouse over the star-shaped "Add to favorites" button at the top of the menu, its function is shown.
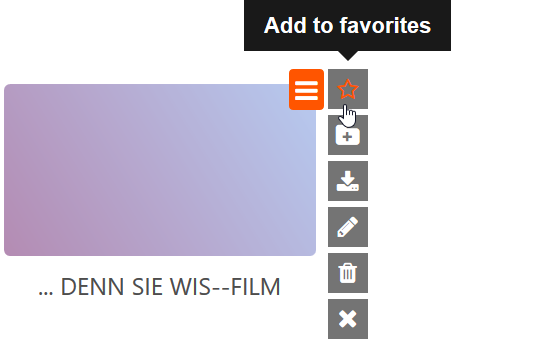
When you click the Favorites button, the star-shaped icon is filled with orange. The asset has now been added to the Favorites layer and is displayed there.
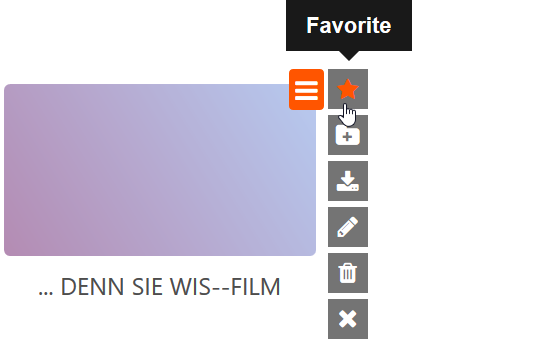
Remove asset from the Favorites layer
If you click the "Favorite" button again, the star icon is no longer filled and the asset is no longer listed as a favorite.
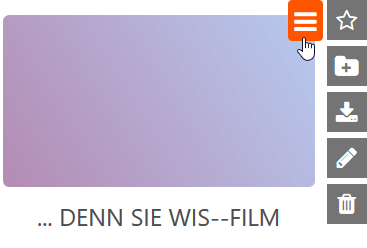
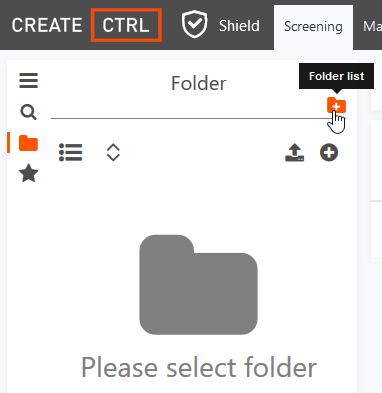
2. Add asset to a folder
To add an asset to a folder, you must first select at least one folder in the folder layer in the menu bar in the upper left corner. To do this, click the "Folder list" button. This will open a new window that allows you to edit the folders.
Editing folders
In the new window, you can either add a new folder or edit existing folders.
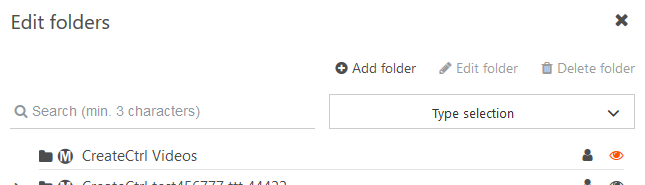
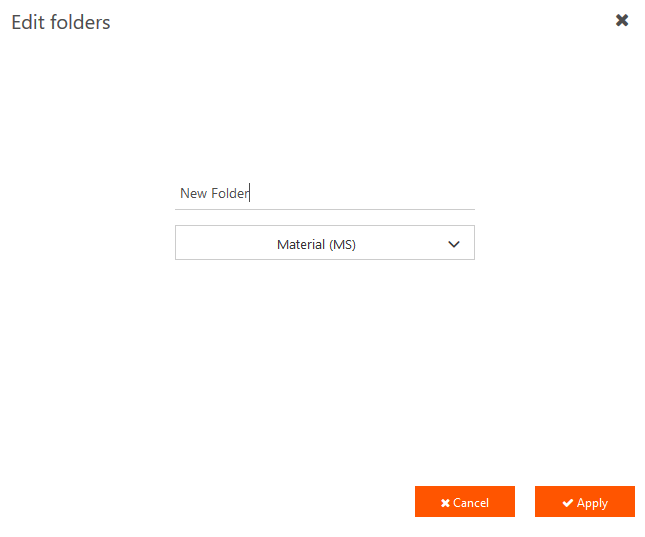
Adding a folder
Click the "Add folder" button to create a new folder. Name the folder and click "Apply."
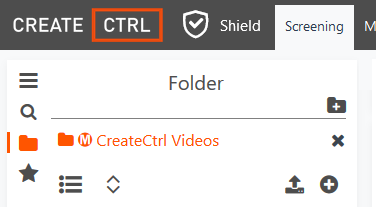
When you click on a folder, all assets assigned to that folder are displayed. When you click on the orange hamburger button of an individual asset, various editing options are displayed. By clicking on the "Add to folder" or "Remove from folder" buttons, you can easily perform those actions.
The "Add to stock" button
Note: Only when you click on the eye-shaped symbol "Add to Stock" will the folder will become visible. The eye-shaped symbol becomes orange. Folders can be set as either public or private; multiple users can access public folders.
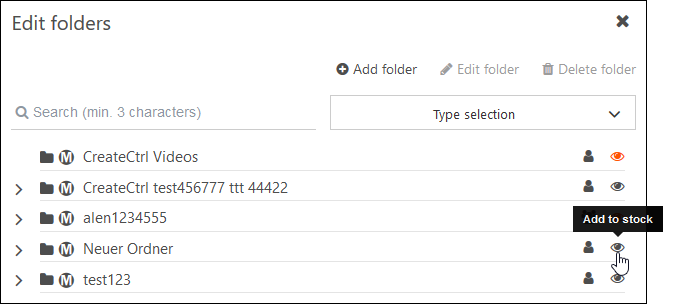
In the example above, the folder "CreateCtrl Videos" has been made visible. Once you close the window and return to the Folder layer, the selected folder or folders will be displayed. When a folder is selected, assets can either be added to the folder, or assets that are already in the folder can be edited.
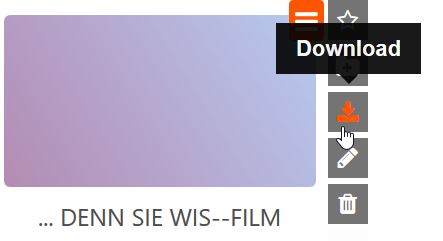
3. Download asset
The Download function lets you either open the asset in the browser or save it on your computer.
4. Editing an asset
Click on the "Edit" button.
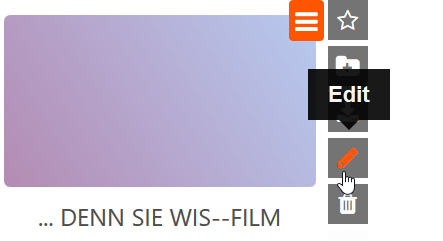
A new window with five tabs appears.
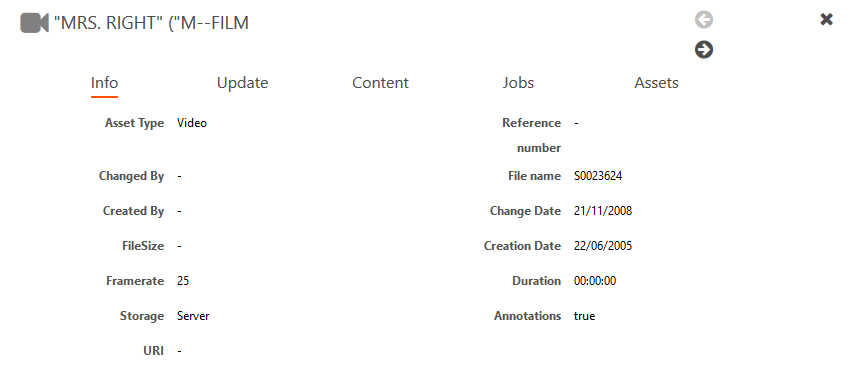
The asset can be edited according to the respective tab:
• Info: Provides information about the asset type, creation/modification date, location, URL, file name, etc.
• Update: You can edit the title, number, keywords and keywords as well as the description and URL in this space.
• Content: The asset can be connected to different media applications according to customer requirements. A program/episode can be linked to the asset via the content search.
• Jobs: This tab is customer-specific. Certain jobs such as creating thumbnails of the video can be done here.
• Assets: The window shows linked assets.
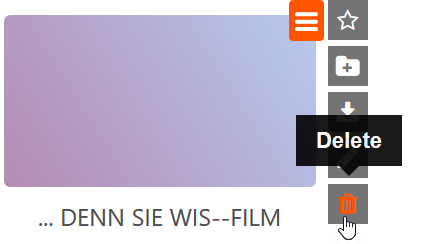
5. Delete asset
When the "Delete" button is clicked, the asset can be removed from the app.
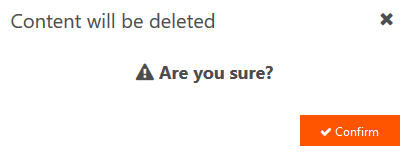
If you click the button, a new window will ask you if you are sure you want to remove the content. If you are, click "Confirm."
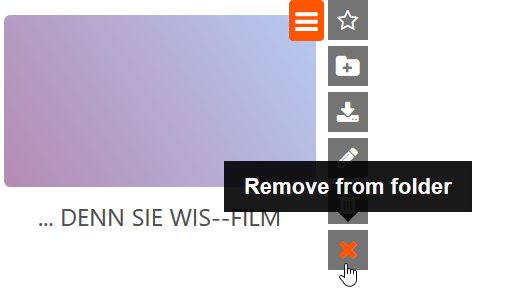
6. Remove asset from a folder
The sixth button "Remove from folder" appears only in the Folder layer. When the button is clicked, the selected asset is removed from the folder it was previously assigned to.
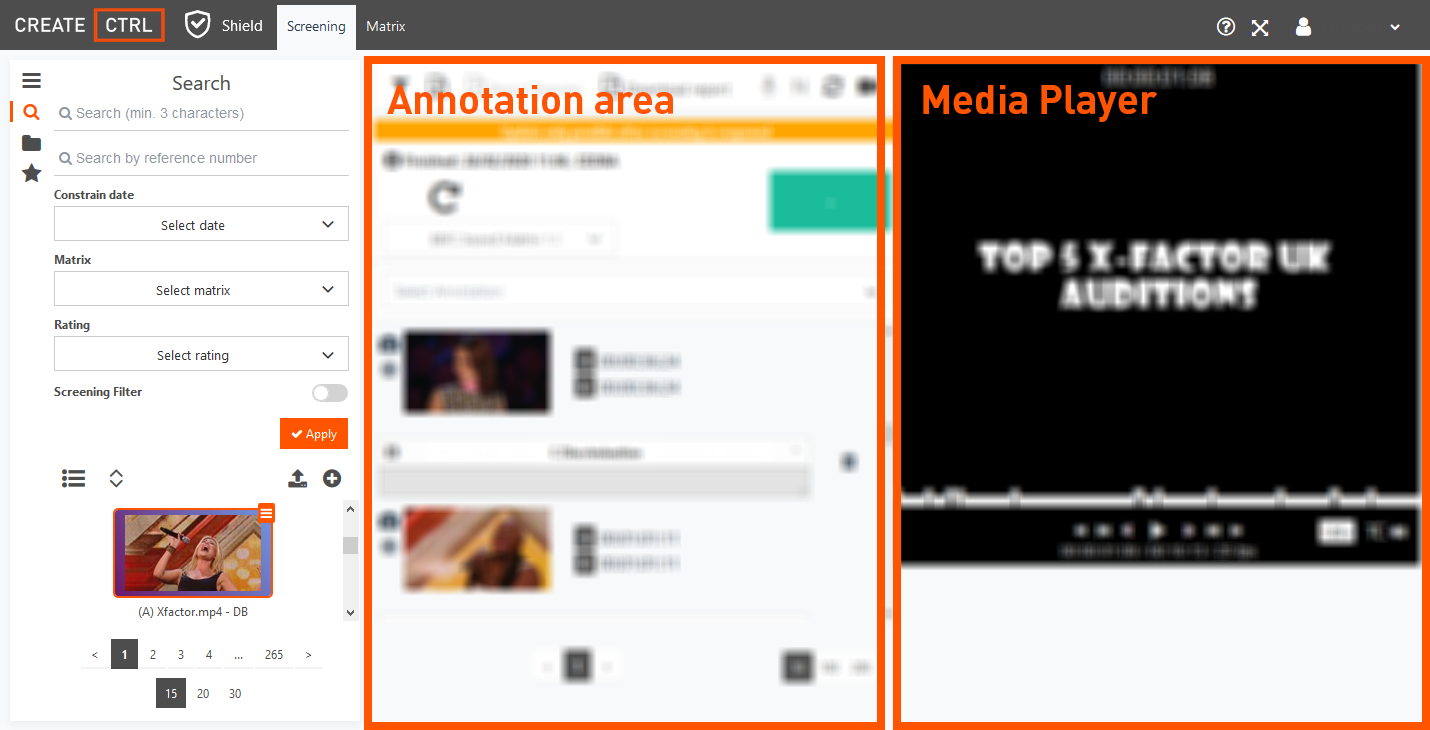
Asset playback
When you drag your mouse over an asset, a button with an arrow appears as a mouseover effect. Click this "Play" button. The selected asset darkens and gets an orange border.
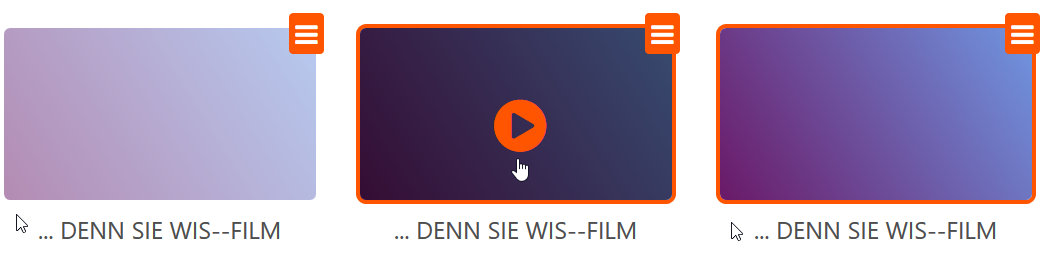
The asset now appears in the Annotation area and in the Media Player, ready for editing.