2.7 Tab Tools
In this tab you can press the following buttons:
| Icon | Label | Description |
|---|---|---|
| JobCtrl | With the JobCtrl wizard you can carry out all necessary imports and exports (e. g. the export of the program schedule, an PTS/APS export). All imports and exports are customer specific. As all jobs differ per client, they will not be further described here. To perform an import or export, please do the following:
|
| ReportCtrl | You can start all required reports in the ReportCtrl wizard. Several general reports can be carried out, further reports can be configured customer specific. To perform a report, please do the following:
|
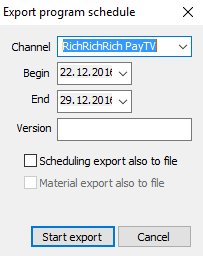
| Export program schedule | If you want to export your program schedule, please save all changes before starting the export. Select this button afterwards.
|
| Insert folder | Inserts a folder into the data sources. |
| Insert note tab | Inserts a note tab into the data sources. |
| Remove tab | Removes a tab from the data sources. |
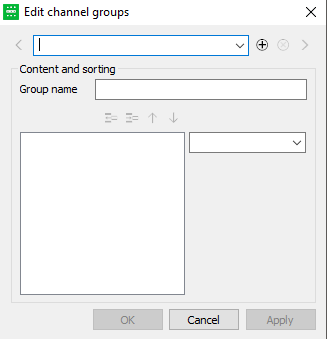
| Edit channel groups | This function allows you to combine various channels to service groups. These channels can then be opened and displayed next to each other in your program schedule window. Thus you may edit the channels simultaneously in one plan view.
To create a service group, please proceed as follows:
|
| Edit channel variation | Channel variations can be created in the ContentExplorer as well as in the Programmer:
|
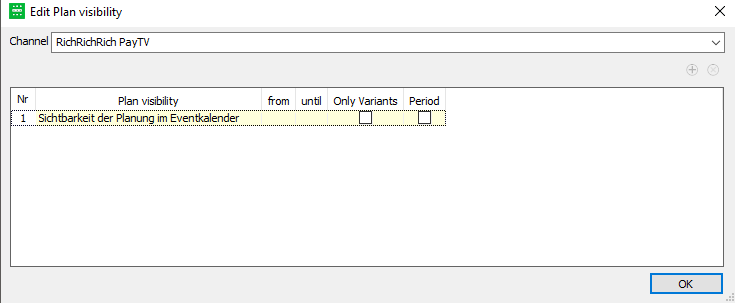
| Edit plan visibility | The visibility of certain data can be restricted. You can do this by clicking this button.
After selecting a channel from the drop-down list, the dialog Edit plan visibility offers several options that can be activated for a certain period of time or up to a certain end date:
You can specify several periods of time for the option Plan variant editable in the Planner. A click on the button |
| Edit schedule sections | Read more in chapter 1.3.1 Edit Schedule Sections. |
| Edit trailer ad break standard allocation |
This dialog enables users to create a standard allocation for trailers; the corresponding slots in the programmer will be filled in automatically. You can create a new standard allocation by clicking on the button
After that, you can enter the allocation. Clicking on the button |
| Open event calendar | Read more in chapter 1.3.2 Event Calendar. |