Annotation Features
Annotations can be added to assets. One asset can have multiple annotation categories. You can create multiple annotations in one category.
It is possible to create assets for dialogs, scenes or content.
Create Annotations
Since you create annotations for assets, it is neccessary to have existing assets in your database. Learn how to create or upload assets here.
Learn how to create annotations with the following steps:
1. Click in the header on Annotations.
2. Choose an asset from the list and click on ![]() Play.
Play.
→ The asset will be now displayed in the videoplayer.
3. In the Contentarea, open the dropdownmenu and select an option from the list.
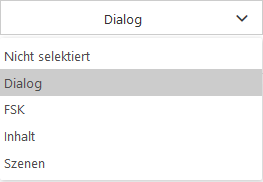
For the following steps we are choosing the category dialog as an example.
4. Click on ![]() .
.
5. Start the video by clicking in the videoplayer on ![]() and play the video for the duration of the first dialog.
and play the video for the duration of the first dialog.
The first flag (TC-in) will be set automatically on the starting point of the video and indicates the beginning of your annotation.
For additional dialog annotations you have to set the first flag (TC-in) by yourself with the button ![]() TC-in.
TC-in.
6. Click on pause ![]() , when you have reached the end of your first dialog.
, when you have reached the end of your first dialog.
7. Click in the annotation on ![]() TC-out to set your second flag as the end of your dialog.
TC-out to set your second flag as the end of your dialog.
8. Now you can enter the spoken dialog of the video in the textfield of your annotation.

For creating additional annotations or editing already created ones, you can repeat the steps 4 to 8.
Set a new TC-in or TC-out or change the text of your dialog.
See the next paragraph to learn how to edit annotations.
Edit annotations
For editing annotations there are several possibilities to choose from:
| Reset TC-in / TC-out | Reset thumbnail | Change Screenshot |
|---|
Resetting TC-in / TC-out
Learn how to reset the TC-in or TC-out flagby following this steps:
1. Click in the Header on Annotation.
2. Select in the Searcharea the Asset you want to edit and click on ![]() Play.
Play.
→ The asset will be displayed in the videoplayer. The corresponding annotations are displayed in the Contentarea.
If your created annotations are organized in different categories, you have to select the applicable category from the dropdownmenu in order to display the specific annotations.
3. Select the annotation you want to edit.
→ The timecode of the placed TC-in flag is now activated and shows the corresponding szene in the videoplayer.
4. Navigate with the videoplayer timeline or buttons to the scene you want to set as your new flag.
5. Now you can either set your TC-in or TC-out:
| reset TC-in | reset TC-out |
|---|---|
| Click in your selected annotation on TC-in. | Click in your selected annotation on TC-out. |
→ Depending on your choice the timecode of your annotation will be exchanged with the new timecode of the current scene.
Set & reset thumbnails
Learn how to set and reset a thumbnail with the following steps:
1. Click in the Header on Annotation.
2. Select in the Searcharea the Asset you want to edit and click on ![]() Play.
Play.
→ The asset will be displayed in the videoplayer. The corresponding annotations are displayed in the Contentarea.
3. Select the annotation you want to edit you want to edit the thumbnail.
→ The videoplayer now displays the scene and timecode of the placed TC-in flag of the annotation.
4. Use the videoplayer timeline or buttons to navigate to the scene you want to set as your new thumbnail.
5. Click on ![]() in the videoplayer to generate a new thumbnail.
in the videoplayer to generate a new thumbnail.
→ A new thumbnail will be displayed on your selected annotation.
Set & Reset screenshots
Compared with thumbnails, you can set screenshots as a frame by frame accurate thumbnail for your annotation.
Learn how to set and rest a screenshot with the following steps:
1. Click in the Header on Annotation.
2. Select in the Searcharea the Asset you want to edit and click on ![]() Play.
Play.
→ The asset will be displayed in the videoplayer. The corresponding annotations are displayed in the Contentarea.
3. Select the annotation you want to edit the screenshot.
→ The videoplayer now displays the scene and timecode of the placed TC-in flag of the annotation.
4. Use the videoplayer timeline or buttons ![]()
![]() to navigate to the exact frame you want to set as your new screenshot.
to navigate to the exact frame you want to set as your new screenshot.
5. Click on ![]() in the videoplayer to generate a new screenshot/thumbnail.
in the videoplayer to generate a new screenshot/thumbnail.
→ A new thumbnail will be displayed on your selected annotation.
Delete Annotation
Learn how to delete created annotations with the following steps:
1. Click in the Header on Annotation.
2. Select in the Searcharea the Asset you want to edit and click on ![]() Play.
Play.
→ The asset will be displayed in the videoplayer. The corresponding annotations are displayed in the Contentarea.
3. Click on ![]() on the annotation you want to delete.
on the annotation you want to delete.
→ The dialog Delete Annotation opens.
4. Click on ![]() Confirm.
Confirm.